(Disclaimer: I am not a professional painter. The tools, technique, and supplies used are for my purpose only. This was a DIY project and in no way a “professional” paint job.)

Original “Navy” blue

Primer Grey

First orange. WAY TOO BRIGHT!
To me color reflects personality. I like to think of myself as a very laid back, go with the flow, free spirit, peace and love type of guy; or as I’m referred to by many a hippie. Anyway I’m not much of a flash and pizzazz guy so when choosing a color for Lucy I wanted to choose a color that would accurately represent my personality.
Aside from some minor surface rust the condition of the original paint was not that bad. There were chips and a few dents here and there but overall I felt that Navy Blue (not the correct name for the original color) didn’t really suit my personality. The blue made me feel like I was driving a “mom van.” I wanted a color that said ADVENTURE!
Growing up I always wanted a red VW Bus with a white top just like Arlo Guthrie in the movie “Alice’s Restaurant.” Although red is my favorite color I personally didn’t think that it would look good on the vanagon. So after many days of searching for the right color I settled on orange.
After purchasing a paint sprayer, primer and orange paint, my father and I began to paint my van. To prep the van for paint, first I washed all dirt and dust from the body. I then removed all lights, covers, grills and vents. I used painters tape and newspaper to cover the windows.
After two coats of implement primer was applied I applied two coats of the orange enamel. Now remember in the beginning when I said picking the right color was important? Well the first orange turned out to be way to bright for my liking. Since there were a few runs to sand out I decided to sand the van down and pick a different color. For some reason every color I picked just wasn’t quite right.
We ended up painting the van somewhere around four different times (not including primer) before I found a color that I loved. On my way home from work one day I stopped at the hardware store and got a pint of brown paint. I mixed that with two different color oranges that I had and somehow I mixed up a color that was close to one of the original VW rust color oranges.
The last time we painted the van the paint did not set up correctly, so it had to be sanded down again. I was never able to put a “finishing coat” on it yet, but I nailed the “adventure” color that I was looking for.

This was supposed to be grey blue.

Nailed the color but it didn’t set right
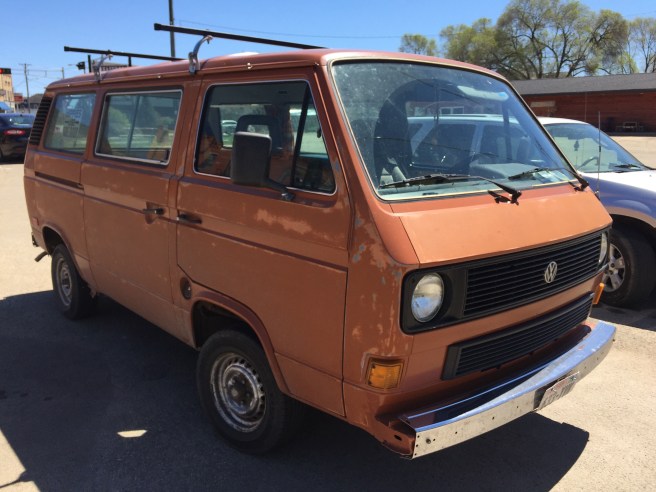
![Current color (photo by: Jenny Patton]](https://i0.wp.com/vanagonnomad.com/wp-content/uploads/2016/11/screen-shot-2016-11-23-at-9-03-12-pm.png?w=214&h=214&crop=1&ssl=1 "screen-shot-2016-11-23-at-9-03-12-pm")
Current color (photo by: Jenny Patton]
(3rd photo “current color” in bottom set taken by: Jenny Patton)